If you're looking to upgrade your bathtub with a sleek and modern look, a frameless bathtub glass door or panel may be just what you need. Not only does it add an aesthetic appeal, but it also keeps the water in the bathtub and out of your bathroom floor. However, installing a frameless glass bathtub door or panel may seem daunting, especially if you're not a DIY expert. In this blog post, we'll guide you through the step-by-step process of installing a frameless glass bathtub door or panel, so you can achieve the bathroom of your dreams.
The Bathtub Door Installation Guide
Installing DIY glass bathtub doors and panels is quite easy with the help of our video guide, making the installation process clear and straightforward. Our video guide will provide a visual representation of the process to help you along with the installation. With the right tools, you can install your own glass bathtub doors and panels in no time. Plus, by doing it yourself, you can save money on installation costs and have the satisfaction of completing a home improvement project on your own.
Before you start your installation, you must ensure to protect the glass by placing the glass onto the cardboard, blanket, or soft surface. Do not allow the glass or its edges to come in contact with hard surfaces such as tile or ceramic.
To download a Bathtub Door Installation Manual in PDF, please click here.
The Bathtub Door Installation Process
Installing DIY bathtub glass doors and glass panels can be a straightforward process when following these easy steps:
Materials:
- Glass door or panel
- Wall anchors
- Screws
- Drill
- Screwdriver
- 5/16" Diamond Tipped Drill Bit
- Silicone Caulk Gun
- Rubber Mullet
- Measuring tape
- Painters Tape
- Utility Knife
- 48" Level
- Suction Cup
- Drop Cloth
- Pencil
- Wire Cutter
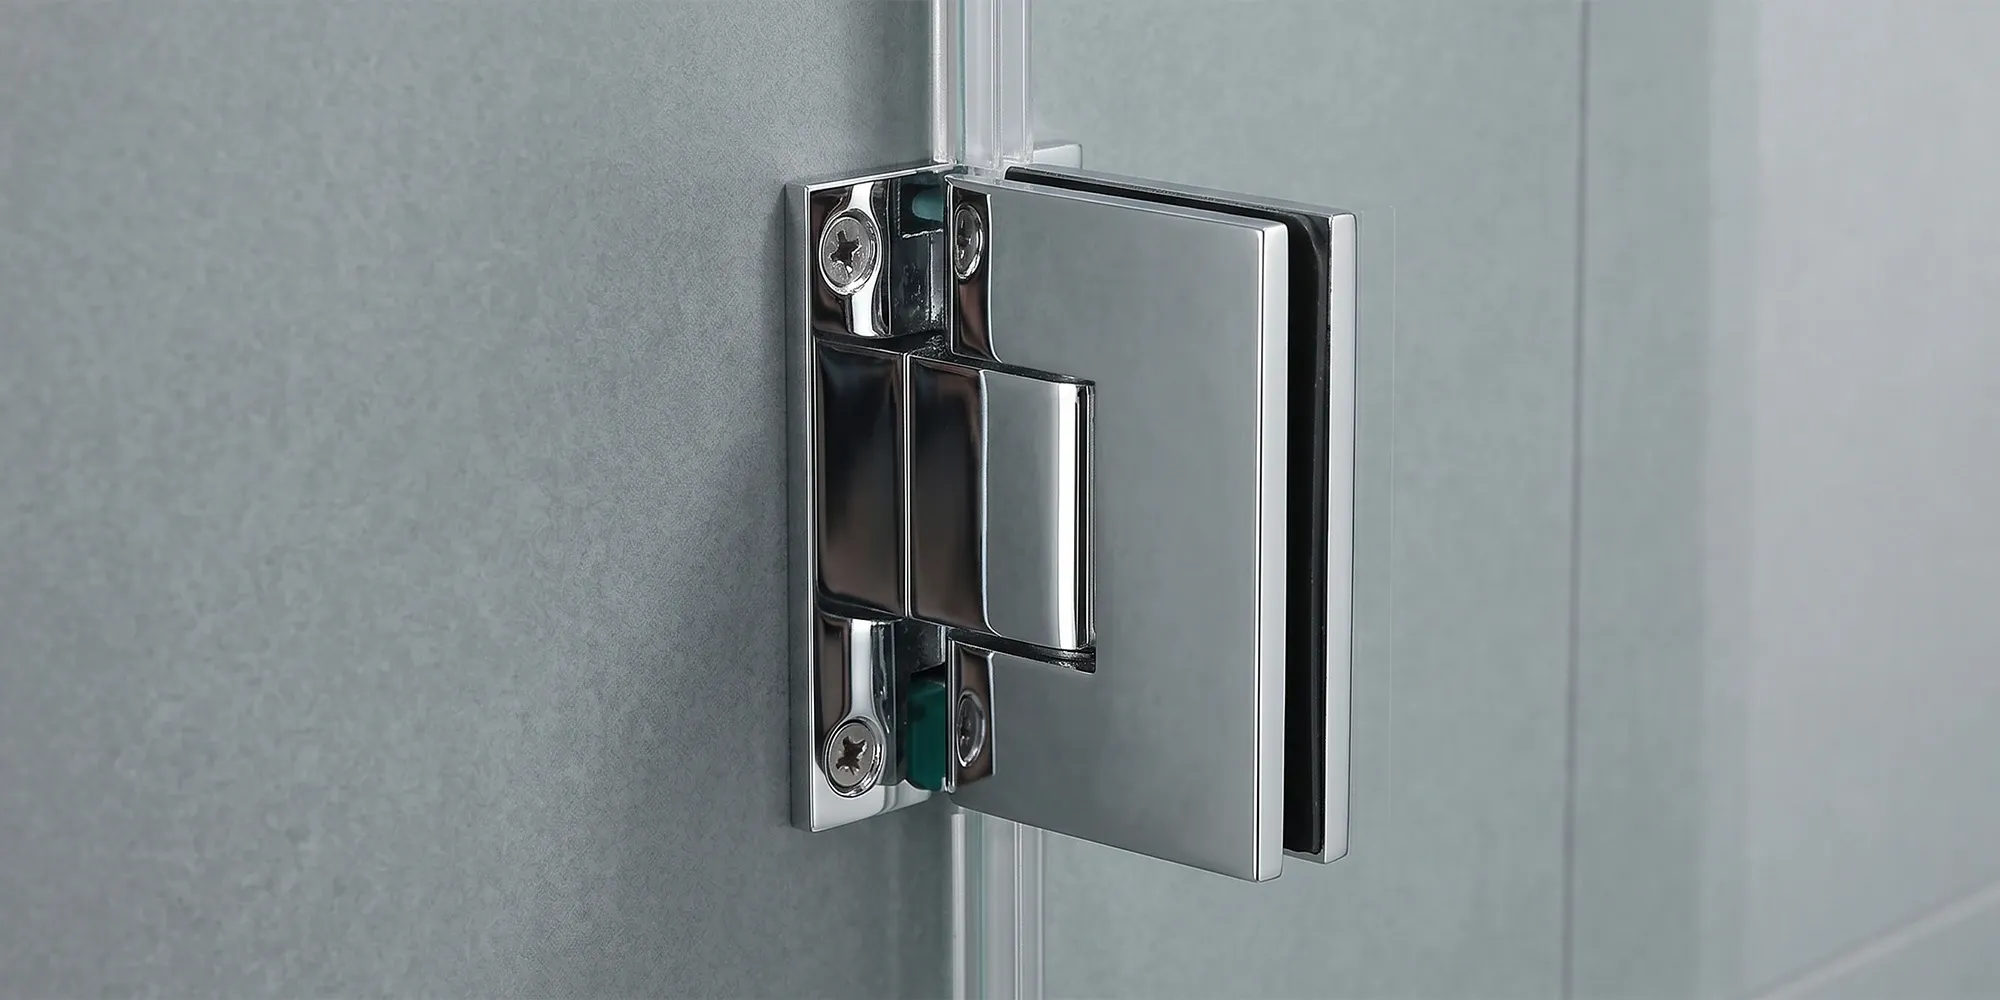
Step 1: Attach the Brackets to the Wall
Place the brackets onto the notches of the glass, and screw them in but do not fully tighten them -- just enough so that they stay on but are still adjustable. Allen screws should be facing inside the bathtub, so they are hidden from the outside view. Do the same for the top and bottom hinges.
The reason hinges have to be installed at this time is to mark up the proper holes on the wall for drilling. Place plastic shims onto the tub where the glass screen will be installed. This will create a 7/16ths of an inch gap between the glass and tub surface. This gap is a placeholder for the drip edge plastic sweep at the end of the installation.
Step 2: Measure and Drill Holes
Place the glass door on top of the shims. Have a friend help you with lifting and holding the glass. Move the glass screen up against the wall and Place a level up against the glass so that it is perfectly level. Mark up the holes for the hinges while still holding the glass perfectly level. There will be 4 holes per hinge, 2 on the outside and 2 on the inside for both the top and bottom hinge. After marking the holes, carefully remove the glass screen, and place it back onto a soft surface.
Drilling the Holes into Studs: Holes will be 3/16th of an inch and will be drilled with a spade tip tile drill bit. Drill your 4 holes per hinge into the stud. Tap the included plastic anchors into the holes with a plastic mallet. If necessary, cut the head of the anchors with a razor to make the wall surface flush.
Step 3: Attach Hinges to Wall
Place the door back on top of the shims on the tub. Make sure that the holes are aligned with your hinges. Install the top hinge first. Start with the top outside hole and tighten the screw slightly, Make sure not to over-tighten the screws.
Next, install the outside bottom screw followed by the inside top screw, and then the inside bottom screw -- completing the installation of the top hinge to the wall and then the bottom hinge installing the screws in the same order as the top hinge.
Step 4: Attach the Glass Door or Panel to the Hinges
Attach the glass door or panel to the hinges using the provided screws. Make sure the door or panel is level and straight. Now open and close the glass door a few times to ensure proper movement of the glass panel. Once satisfied with the screen movement, use a manual screwdriver for the final turns of the screw to make the hinges completely secured to the wall.
The next step is taking the included Allen wrench and tightening the hinges to the glass. Adjust and turn the Allen screws (first the top, then the bottom screws), to make sure the glass is secured to the hinge.
Step 5: Install a Door Handle or Door Knob
This step depends on the type of hardware you have chosen for your glass panel and will involve placing the attachment hardware through the provided opening and securing the hardware from both sides. Make sure to tighten the screws securely, but do not overtighten them as this can crack the glass. Test and adjust the handle or knob to ensure that it is securely attached and functions properly. Adjust as necessary.
Please make sure to use the provided washers with your hardware to avoid contact between glass and metal at all times.
Step 6: Install Sweeps
Installing shower door sweeps on a bathtub glass door is a fairly simple process that can be done with a few basic tools. First, clean the bottom of the glass door with rubbing alcohol to ensure a proper seal.
First, remove the shims so the door can swing out 90 degrees. The bottom sweep is pre-cut and is included. The side of the plastic sweep with the V end will be facing inside the shower. Snap the plastic sweep onto the bottom of the screen and slide it all the way on, tapping it onto the screen so that it is flush.
Next, measure and clip on the plastic sweep for the sides of the glass. After measuring the 3 different pieces of the plastic sweep, cut them with cutting pliers and snap them on for a clean installation. Have the lip of the plastic sweep facing inside the tub, as you did with the bottom sweep. It is important to make sure the sweep is level and flush with the door to ensure a tight seal. With proper installation, shower door sweeps can help prevent water leakage and keep your bathroom clean and dry.
Step 7: Adjust and Tighten
Adjust and Tighten Adjust the glass door or panel as needed to ensure that it opens and closes smoothly. Tighten all screws to ensure that the door or panel is secure.
Step 8: Clean Up
Clean Up Clean the glass door or panel and the surrounding area to remove any debris or fingerprints.
With these easy steps, you can install DIY bathtub glass doors and glass panels in no time. Remember to take your time, follow the instructions carefully, and use the proper tools and materials for a successful installation.