
Before drilling any anchor holes for a DIY bathtub glass door, verify six things: wall plumb, tub edge level, anchor points, wall type, shower head position, and hardware match. Catching a wall or wall-type issue beforehand prevents the most common DIY install failures.
Reviewed by John Flouhouse, Installation Team Lead at Dulles Glass, based on field measurements and bathtub enclosure installations.
Before installing a bathtub glass door, take ten minutes to check the wall, tub edge, anchor points, wall material, shower spray direction, and hardware. These pre-install checks help prevent crooked glass panels, loose clamps, cracked surrounds, and splash problems after the door is installed.
This bathtub glass door installation checklist is based on common issues our install team sees during bathtub glass door measurements and installation — six things worth confirming before any anchor hole goes in.

A finished bathtub glass panel after proper pre-install checks.
Key Takeaways
- Wall plumb on the anchor side — should be within 1/4 inch over 72 inches.
- Tub edge level where the panel will sit — small deviations need shimming.
- Anchor points — studs or solid blocking behind the wall.
- Wall type — tile vs acrylic vs fiberglass changes the anchor hardware.
- Shower head position — confirm spray doesn't exit the planned panel location.
- Anchor hardware — matched to wall type and glass weight.
Tools You'll Need
- 4-foot level
- Stud finder
- Tape measure
- Painter's tape
- Drill bits rated for tile or your surround material
- The manufacturer's install guide
Bathtub Glass Door Pre-Install Checklist
- Check that the anchor wall is plumb.
- Confirm the tub edge is level.
- Locate studs or solid blocking.
- Identify whether the wall is tile, acrylic, or fiberglass.
- Test where the shower head sprays.
- Match anchors, gaskets, clamps, and silicone to the glass and wall type.
1. Check Whether the Wall Is Plumb
The panel anchors into the wall on one side. If that wall isn't plumb, the glass won't sit straight and the clamps won't seat flat.
Hold a 4-foot level vertically against the wall where the panel will clamp, from tub edge up to the planned top of the glass. Note any deviation from vertical.
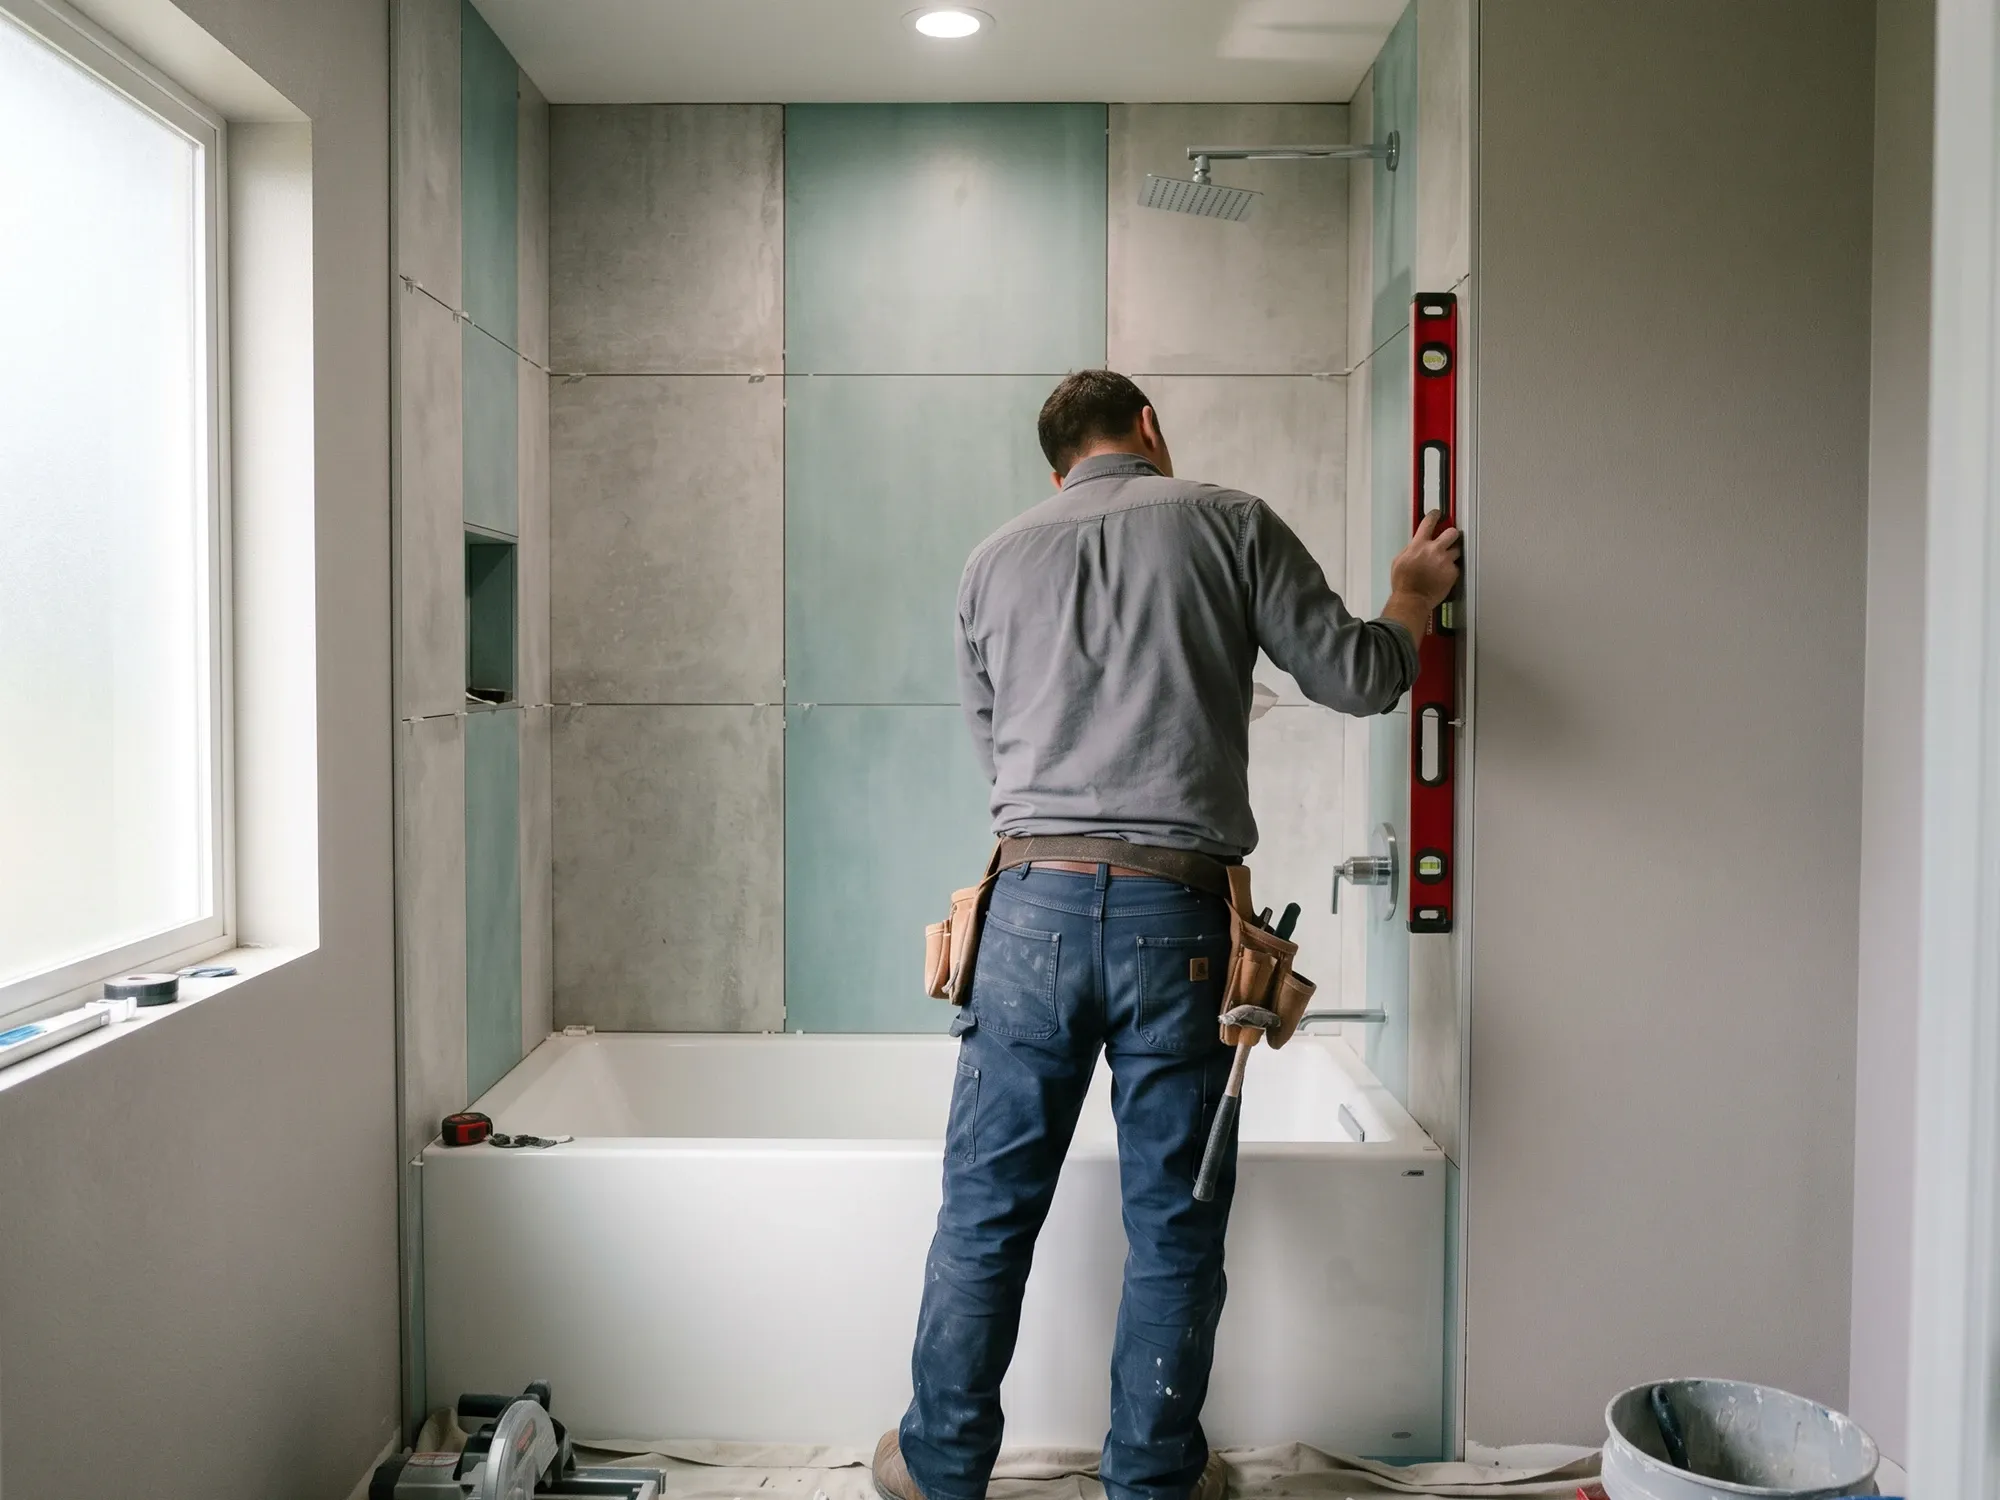
Check the anchor wall for plumb with a 4-foot level before drilling.
Tolerance:
- Within 1/8 inch over 72 inches — ideal; standard hardware seats flat
- 1/8 to 1/4 inch over 72 inches — works with shimming behind the clamp
- Over 1/4 inch over 72 inches — standard kit may not seat properly; custom configuration recommended
2. Make Sure the Tub Edge Is Level
The panel base sits on or just above the tub edge. If the tub edge isn't level, the panel will tilt.
Lay the 4-foot level across the tub edge where the panel will land. Common deviations come from:
- Settled framing that pulled one end of the tub lower over time
- Tub installation that wasn't shimmed level on day one
- Subfloor irregularities
Tolerance is similar to wall plumb — up to 1/8 inch is fine; bigger deviations need to be corrected with shims behind the panel base or addressed before the install.
3. Find Solid Anchor Points Before Drilling
The wall clamps need to anchor into something solid. The options:
- A stud — ideal; wood framing accepts standard wall anchors.
- Solid blocking — 2x lumber installed between studs as a backing.
- Substrate-specific anchors — for hollow walls (acrylic, fiberglass), specialized toggle bolts or backed plates.
Use a stud finder before drilling. On tile-over-cement-board walls, stud finders work reliably. On acrylic or fiberglass surrounds, the substrate dampens the signal — tap the wall and listen, or check the back of the wall from an adjacent closet if accessible.
If the clamp location doesn't hit a stud
Two options: shift the clamp slightly to hit a stud (some kits allow 1-2 inches of flex), or use heavy-duty toggle anchors rated for the panel weight. Don't drill standard drywall anchors into the back of a tub surround — they pull out within a few years.
4. Match Anchors to the Wall Type
The wall type behind the tile or surface determines the anchor hardware. Three categories:

Tile, acrylic, and fiberglass surrounds each call for different anchor hardware.
- Tile over cement board with studs or solid backing — suitable for standard load-bearing hardware when anchors reach framing or approved backing.
- Acrylic surround — plastic sheet over a foam or fiberglass backer. Hollow-wall-rated toggle bolts or substrate-specific anchors needed.
- Fiberglass surround — similar to acrylic. Same hardware approach.
Tap the wall to identify. Tile sounds solid; acrylic and fiberglass sound hollow. The right anchor on each type prevents premature failure.
5. Check Where the Shower Head Sprays
The shower head spray cone determines whether the planned panel placement actually controls splash. Confirm:
- Where the shower head is mounted — back wall, side wall, or open-end wall.
- The spray direction — angled toward the back wall, the floor, or the open end.
- The vertical position — head height affects how far horizontally the spray travels.
If the shower head sprays toward the open end of the tub (the side the panel doesn't cover), splash will exit the tub no matter how good the panel install is. In that case, either reposition the shower head, choose a wider panel, or add a return panel.
6. Confirm the Hardware Fits the Glass Weight
Verify the hardware in the kit matches the wall type and the panel weight before drilling.
Hardware checklist
- Anchor type matches wall (stud anchor, toggle, or substrate-specific)
- Anchor weight rating exceeds the panel weight by at least 20%
- Silicone is shower-rated, neutral-cure (not acetic-cure)
- Gaskets are the right thickness for the glass thickness (1/4" or 3/8")
- Hinge or clamp screws are the length the manufacturer specifies
Need Help With a Bathtub Glass Door Pre-Install Check?
If anything on the checklist comes up unusual, a professional measurement and installation removes the guesswork. Dulles Glass offers free in-home measurements for custom bathtub glass enclosures.
View our bathtub glass enclosures, compare custom shower doors, or request a quote for professional installation.
Frequently Asked Questions
What should I check before installing a bathtub glass door?
Verify wall plumb on the anchor side, tub edge level, location of studs or solid blocking behind the wall, wall type (tile, acrylic, or fiberglass), shower head position, and that you have the right anchor hardware for the wall type. Confirm all of these before drilling any anchor holes.
Can I install a bathtub glass door on an acrylic wall?
Yes, but you need substrate-specific anchors. Acrylic and fiberglass walls are flexible; standard plastic wall anchors will crack the surround within a few years. Use hollow-wall-rated toggle bolts or backed plates designed for thin substrates.
How do I find studs behind a tub-shower wall?
A stud finder works on tile-over-cement-board walls. For acrylic or fiberglass surrounds, a stud finder is less reliable; the substrate dampens the signal. Tap the wall and listen for changes in pitch, or check for visible mounting locations from the back of the wall in an attached closet.
What anchor hardware do I need for a bathtub glass door?
For tile walls with framing behind, standard wall anchors into studs. For acrylic or fiberglass surrounds, toggle bolts or substrate-specific anchors rated for hollow walls. Match the hardware to the panel weight: 1/4 inch glass tub kits are typically 30-60 pounds; 3/8 inch frameless panels are 60-100+ pounds.
Should I install a bathtub glass door if my walls are out of plumb?
If the walls are out of plumb by more than 1/4 inch over 72 inches, a stock DIY kit may not fit cleanly. Either order a custom configuration sized to your specific walls or schedule a professional install where the technician can adjust on-site.
When to Call a Professional
Call a professional installer if the wall is more than 1/4 inch out of plumb over 72 inches, the tub edge is noticeably uneven, the clamp location misses solid backing, or the wall is acrylic or fiberglass and you are unsure which anchors are safe for the panel weight.
Walls out of plumb or surround acrylic?
Dulles Glass offers free in-home measurements and professional installs for custom bathtub glass.


